Wednesday, June 29, 2011

Oral Exams - Part 2: Sound Boxes

The second day of exams was met with even more nervous anticipation than the previous day!  There were so many more points of contention within the lessons and we all seemed to remember different aspects and details for each presentation in the album.  I unfolded the small strip of paper after choosing from "the dish," and was somewhat worried:  "Sound Boxes,"  it read.  Immediately, memories of last summer's presentation flashed in my mind and I remembered a panicky-confused feeling while watching the trainer's lesson - this lesson, as written in the album, was clearly not the way I ever presented it in the classroom, nor did I see a supremely valid reason why it should be done as such.

During last summer's session, I distinctly remember watching with confusion as the trainer kept switching hands while listening to each of the Sound Cylinders.  It could have been that at that point in the summer I was simply overloaded with information and I was having difficulties processing additional details! The point remained, however, that I felt the lesson was in need of slight revision so that it may be presented in the most clear, concise manner. 

Over the course of the follwoing school year, I made a conscious effort to analyze the presentations of the Sensorial lessons which utilized the matching of pairs, specifically when there is a "reference" item; i.e. Touch Tablets, Fabrics, Smelling Bottles, Thermic Tablets...  In these lessons, the child identifies a "reference" and uses that as a guide not only in the progression of the exercise, but also in the organization of the material within the workspace.  Additionally, the child must feel (or smell) the item throughout the lesson by touching with one hand.  It also allows for the child to see the lesson more clearly and not be distracted my too many movements.  For these reasons, I feel that the Sound Boxes must also be handled in the same manner - by using just one hand. 

Upon reflecting on my experiences in the classroom with the Sound Boxes, I definitely felt more confident as my turn approached an the presentation commenced.  It went smoothly and the purpose of the lesson was demonstrated clearly.  Through the use of the Sound Boxes as child is able to train his auditory capacities and become aware of the sounds around him.  After discussing the details of the material during the feedback portion of the exam, I reminded the panel of my changes within the lesson which was met with appreciation and understanding.  ("Whew!")

A set of Sound Boxes (from Montessori-n-Such).  Please note:  Placement of boxes and cylinders are not shown the way they are presented in my classroom!
I'd be most interested in hearing how others present the Sound Boxes as well.  As always, thanks so much for your input and comments!

Tuesday, June 28, 2011

Oral Exams - Part 1: Button Frame

I thought I might take the opportunity to share with you my experiences from the four days of Oral Examinations which finalized the Montessori Training course I successfully completed last week.  It is difficult to express the amount of information retained and ingrained while preparing for these exams - not only is there a significant amount of lessons needed to be memorized, but one also needs to understand previous lessons, variations/extensions of activities, direct and indirect purposes of any given presentation, and hopefully some meaningful experiences with the lesson in the classroom.  This information, along with other detailed knowledge, is expected during the feedback portion of the exam following the presentation of the lesson - hence the term 'Oral Examination.'   Most stress-inducing, however, is the fact that no one knows which lessons they will be presenting for the exam until it is literally picked out of a box at the beginning of the session!

The first day exams was dedicated to the lessons of Practical Life.  I recently published a post indicating the purpose and significance of these activities which you can read about here.  The morning of the Practical Life exam was met with much anticipation, nervousness, and tension - the whole year had been in preparation for this moment!  My group of cohorts and I reviewed our Albums as we waited for the exam to begin.  The clicking of heeled shoes was heard coming down the hallway and in to our exam room.  "Let's put your Albums to the side now," we were instructed.  The examination process was explained to us once more followed by the presentation of  "the dish."  Inside a clear, crystal dish were eight lessons printed out on folded slips of paper.  "Which one will I get?"  I thought to myself as my fingers reached into the small collection of papers.  Relief came to me when the paper was unfolded and in clear, large letters it said, "Large Button Frame." 

Once the group put our collection of lessons in order, it was time to begin.  The following video demonstrates how I presented the Large Button Frame, albeit at my kitchen table at home using an extra "practice frame."


Afterwards, I spoke about the order of the dressing frames and where the Large Button Frame came in relation to the others.  Also, I talked about how the order is directly related to the materials in an individual classroom.  For example, in my classroom, both the Large and Small Button Frames come before the Snap Frame - the snaps on our frames are quite difficult to manage and the child needs strong finger and hand muscles to manipulate it successfully.  Additionally, I conveyed the overall successful usage of the Dressing Frames in my classroom over the course of the year (which can be seen in the first three photos of this post). This was, in my opinion, a direct effect of simply lowering the Dressing Frame stand by sawing off the lower portion of they typical three-level stand.  Our classroom's stand is custom-modified to be lower and more in keeping with the young child's physical level which allowed more opportunities for natural exploration of the materials.
Our Dressing Frame Stand is similar to the one in this photo, only it has two layers rather than three (as seen here).
I was pleased to have had the opportunity to present and discuss such a fundamental lesson which has far-reaching implications not only in the classroom, but also for the child's overall development, well-being and sense of self.

Sunday, June 26, 2011

It's Official...

Yours truly is now known at home as "MACTE Mama!" given the successful completion of the Montessori Accreditation Council for Teacher Education (MACTE) accredited American Montessori Society (AMS) training course!  Not only were Little Miss and I greeted by my dear husband and two boys with flowers and gifts at the airport, but also, look what awaited me at home:

Festive flowers, decadent cake (our favorite:  Chocolate Ganache!), congratulatory card and peridot earrings!
Yes, I have already mentioned how wonderful my dear husband is and now, I'm confident you must see it as well....!  Here is a close up of those earrings:

As peridot is the gem of Maria Montessori's birth month, my husband presented these to me as a symbol of my "knowledge and dedication to the Montessori Method." 

I am so fortunate to have had the opportunity to complete this training and forever grateful for the unending support of my family!

Thank you! Thank you!  Thank you!

Now, on to the Master's program at St. Kate's...

Friday, June 17, 2011

Wish Me Luck!

I'll be taking a little break from this blog world for a tiny bit as the time has come for the Oral Exams which will complete my Montessori training program with the Montgomery Montessori Institute.  I am feeling in a state of shock that this time has finally come!  The shock, however, might stem from the fact that for this entire week before the exams I am without my albums - they had to be sent UPS ahead of time so that I wouldn't be lugging them around the airports or adding exorbitant baggage fees to my travels...  In any case, all I can do is hope for the best - wish me luck!


Thursday, June 16, 2011

An Early Farewell

The time has come for me to wish my students a happy summer and good days ahead - I have to miss the last week of school in order to complete my Oral Exams with the Montgomery Montessori Institute.  This Friday is my last day in the classroom until the new school year begins in September.  It was with a heavy heart that it was explained to the children I would not be in school on their last days together.  Some were holding back tears, as was I!

I wanted to leave them with a positive reminder of how far we have come during the past year and how our work together, as a class, has left such positive impressions on each of us.  So, do you remember our amazing, collaborative, Pollock-inspired drip painting from this post?  Well, each child now has one to take home as a reminder of our class and the wonderful accomplishments we have made this year!


Small prints of our collaborative art project.  Each child will have one to take home and hopefully remember all the fun times we've had together this year!

Instead of saying "Goodbye,"  I'll leave my students with a "So long!"  It's been an inspiring year!

Tuesday, June 14, 2011

Say 'Cello!'

Our classroom had the delightful experience of having a cello demonstration this morning!  One of the parents offered to come talk to the children and demonstrate playing the cello.  I am very much in support of parents sharing their knowledge and expertise in the classroom and this was a perfect example.  In preparation of this visit, I introduced the children to some classical cello concertos and placed a CD in the  (music) listening station for several days.  Each day leading up to the visit, we casually discussed various instruments and the different families, i.e. string, wind, percussion, etc.  When our guest arrived this morning with her cello, the kids sat at rapt attention!  We learned the names of the parts of the cello, listened to the types of sounds it can make, took turns feeling the sound's vibration on the body of the cello, and even had the opportunity to play a few strings!  Lastly, we were treated to a beautiful rendition of Sen-San's 'The Swan' which was met with much applause and even a robust "Bravo!"

Monday, June 13, 2011

Father's Day Gifts

Oh, how lovely these are turning out to be!  During the process of making their Father's Day gift, the children are not only enjoying the creation of a unique painting on canvas, but they are also reviewing their letter sounds. Here is what we did:

First, a tray was prepared with different colors of tempera paint.  Each cup received a "dot painter" which are simply small paint applicators with a sponge top.  I found these at the craft store and thought they would be fun for painting...  The marker is for the child to write their name on back of the canvas.

Next, the child sounded out the word 'dad' and used letter stickers to make the word.  We used Crayola's Reuseable Peel and Stick Letters which were easy to peel off (as you will see below).  Then, the child used the painters to dab the entire canvas, including painting over the letters.

Lastly, the child (with teacher's help,  if needed) peeled away the letters which revealed the 'word of honor'.  These are some of the creations drying on our drying rack. 
Completely perfect for the occasion!  The children are very proud of these and are anticipating with great excitement the day they will give it to their dads.  If I get the chance, I might stop in our local dollar store to find suitable frames in which to place the paintings...if not, they are great just they way they are!  Later, we will have the children wrap their gift with plain newsprint (from the end rolls from our local paper) and decorate...

This project is turning out to be so simple and fun - and there is plenty of time before Father's Day if you wanted to make some of your own either at home or with groups of children.  Not only are the supplies readily available at most craft stores, but it is fairly economical too - especially if you can get the canvases on sale!

Friday, June 10, 2011

Classroom Scenes From This Week

 Static Addition with the Stamp Game.
Exploring differences of temperature with the Thermic Tablets.

Sewing a shape with needle and thread. 

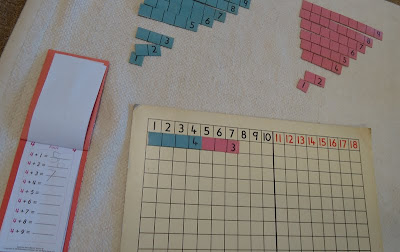
Addition tables with the Addition Strip Board.
Fun with the Dot Game!

Reading practice with phonetic word cards.  This child was enjoying telling a story that used each word she read!


A lesson about the articles 'a' and 'the.'

Coloring a "Peaceful Person" template. 


Exploring concepts of geometry with the Superimposed Geometric Figures.

The Negative Snake Game (Subtraction) in progress...
...and completed.

Some fun rainbow art - just started...

...and the rainbow completed!
 
Addition with Number Rods and Cards


Extension work with the Brown Stair.  Here, the child wished to trace the end of each prism onto dark paper, resulting in an intriguing series of various sized squares.


Carefully inscribing the red squares from the Superimposed Geometric Figures.


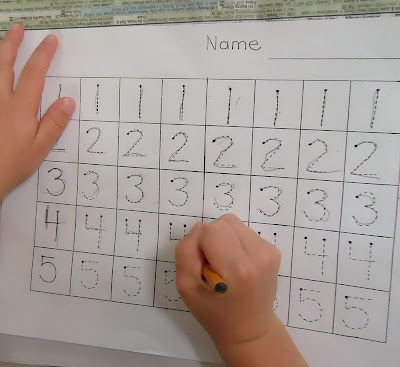
Tracing numbers.


Refining writing skills and learning about leaf shapes with the Botany Cabinet.


Small-motor practice with colors and clothespins!
 

Wednesday, June 8, 2011

Line Art

One of the newest Art lessons I recently placed on the shelves uses a ruler, black marker and oil pastels.  The child uses the marker to make straight lines on paper and fills in the resulting shapes with vibrant colors of oil pastels.  To add a touch of interest to the activity, I placed the oil pastels in our well-loved crayon roll.  The children enjoy unbuttoning and unrolling the crayon roll to set up their work just as much as rolling it back up and buttoning it closed at the end.


The materials on the shelf:  tray holding jar with pencil and black marker, crayon roll filled with oil pastels, clear art mat under tray, napkin holder holding white construction paper cut in half,  a print of Piet Mondrian's work for interest and inspiration!

Contents of crayon roll: I used only seven colors and did not fill all of the slots because I did not want to overwhelm the children with too many color choices...

First, the child makes lines with the ruler and black marker. (The pencil is used to write the child's name on the back of the paper).

Now, the shapes are filled with oil pastels...

Some finished pieces in our hallway - Very cheerful, bright and representative of each individual child!


Tuesday, June 7, 2011

The Significance of Practical Life

Look what I found in my draft files!  I am so excited to share this especially after my recent post about Montessori Floor Scrubbing, which you can find here.  The exercises of Practical Life are so essential to the harmony of the classroom and I find it inspiring that even now, at the end of the school year, these lessons play a vital role in the children's days at school.

__________________________________________________________________________________


I often get the feeling while speaking about my Montessori classroom, that generally, people need to know more about the Practical Life activities.  Too many times, it appears to be glossed over in parent discussion while topics of Language and Math materials generate more interest. For this reason, I wish to share additional information regarding the critical significance of the Montessori Practical Life exercises.

The Montessori classroom is a meticulously prepared environment designed specifically to meet the needs of the child both physically and emotionally.  One aspect of the prepared environment includes the Practical Life activities.  Many Practical Life activities are tasks the child sees routinely performed in the home.  They each serve a meaningful purpose as the child masters each piece of work such as tying shoes, pouring water, sweeping, or sewing and cooking. Through Practical Life activities, a child will also develop and refine social skills.  These skills developed through Practical Life build self-esteem, determination and independence. 

The student learns to take care of himself and the surrounding environment.  Maria Montessori explains in, The Discovery of the Child, “Through practical life exercises of this sort the children develop a true ‘social feeling,’ for they are working in the environment of the community in which they live” (5, pg. 97).  Additionally, fine motor skills are improved through use of the Practical Life materials. Through repeated tasks which enable a child to refine concentration, coordination, independence, and order, a child’s sense of self-worth grows.  The Practical Life skills are an essential component in the Montessori classroom.  Not only do they provide a link between home and school for the new Montessori student, but they provide a foundation for life-long love of learning.

While appearing quite simple and repetitive, Practical Life activities are highly purposeful.  A child engaged in such activities demonstrates high levels of concentration, sense of order, and refinement of fine motor skills.  Also, they show a sense of independence through caring for oneself and the environment.  Furthermore, they show respect for classmates and teachers and develop a sense of pride.  Not only are these skills and qualities necessary to progress in the Montessori classroom, but they are also needed as an individual develops into adulthood. 

Practical Life activities can be divided into six main categories.  First, are Preliminary Exercises which assist in creating routine and order in the environment and are prerequisites for other activities.  How to a roll a mat, carry a chair, or how to open and close a door are examples of Preliminary Exercises.  Practical life exercises also include Fundamental Skills such as pouring, spooning, or tonging.  As with all lessons in the Montessori classroom, these activities follow a sequential order and ideally, each lesson builds upon the last.  Another category is Care of Self.  Activities such as washing hands, buttoning, or tying shoelaces assist the child to become physically independent.  Care of Environment is another category involving activities such as sweeping, watering, cleaning, etc.  Control of Movement is an area of Practical Life which encompasses lessons such as Walking the Line and the Silence Game.  Additionally, social Grace and Courtesy lessons are introduced to the child.   These may include lessons on how to say please and thank you, interrupting someone, or introducing friends and acquaintances.  Montessori stressed the relationship of these exercises to the general happiness and well being of the child.  “A child who becomes a master of his acts through long and repeated exercises [of practical life], and who has been encouraged by the pleasant and interesting activities in which he has been engaged, is a child filled with health  and joy and remarkable for his calmness and discipline” (The Discovery the Child, 5, pg. 93).

Varying types of presentations can be used by the teacher to introduce Practical Life activities.  First is a collective introduction given the children at once.  This could include proper table manners, how to interrupt someone, how to speak with an inside voice, or how to turn the page of a book.  Another method is a group presentation given to a small gathering of children.  The last method of introduction is Individual, given only to one child at a time. 
           
Montessori believed the prepared environment is directly correlated to the child’s development.  The classroom is a specifically designed area arranged solely for the children.  There should be a variety of movement and activity and all work operates together through the disciplines.  Montessori also believed in the importance of aesthetically pleasing classrooms.  Children respond well to beauty, order, and quality in their environment.

Through the Practical Life activities in the Montessori classroom, a child not only learns concentration, coordination, independence and order, but also how to interact with others and gain an understanding and appreciation of the environment.  The child begins to build himself from within while learning to treat himself and others with respect and dignity.  These understandings ultimately prepare the child for entry into society and a lifetime of self-respect and self-worthiness.  Practical Life activities in the Montessori classroom ultimately provide the foundation for success in all areas of life. 

Below are some photos of the Practical Life areas in my classroom:


Handwashing Table

Dry Transferring (set up with a Winter theme).

Wet Transferring (set up with a Fall theme).


Polishing Materials - top: Leather Polishing; middle: replenishables (cotton balls, q-tips, polishing cloths); bottom from left to right:  Metal Polishing (red), Glass Polishing (blue), and Wood Polishing (yellow).

Care of Environment supplies - top:  Cleaning up a spill (orange); Window Washing (green);  bottom:  Washing the Easel (blue) which can also be for table and chair washing...

Monday, June 6, 2011

Color-Mixing Extravaganza

The following lesson has been in perpetual use ever since it was introduced to the children at the beginning of last week.  These materials provide a meaningful way for the child to explore colors, specifically, mixing primary colors to make secondary colors. The idea came from here, as well as the printable 'Color Mixing Wheel,' which has been instrumental in inviting the children to do the lesson - doesn't it just beg to be used?!

Color mixing wheel attached to our 'art board.'

Materials on small tray:  pencil (for writing name on paper towel), small jars of colored water in primary colors with droppers, sponge (to wipe the workspace when done), toothpick for mixing colors on color wheel.


The materials on the shelf.  The basket to the right holds the paper towels.
 

The child sets up the materials at his workspace and uses the colored water to drop onto the corresponding colored dots on the wheel.
 
The child uses the toothpick to mix the colors on each circle.

The paper towel is placed on top and voila
It is wonderful to watch the children's eyes glimmer with excitement each time they complete this activity.  Amazingly, that shine in their eyes in not diminished even after the fourth or fifth time of completion - it only shines more!

Sunday, June 5, 2011

Floor Scrubbing 101 (Montessori Style)

I am very much enjoying the review of Care of Environment lessons as I prepare for my Oral Examinations at the end of June.  While the children in my class have been introduced to Table and Chair Washing, Window Cleaning and Washing the Easel, they have not been introduced to the formal lesson of Floor Scrubbing.  The main reason being is that our classroom floor is all hardwood and does not include tile - anywhere.  Enter my kitchen floor at home!

I really wanted to put together this lesson for several reasons.  Firstly, I wanted to practice the sequence of steps of the presentation of the lesson in preparation for the exam.  Secondly, I wanted to see if plain baking soda could really clean the grime on my floor.  Thirdly, what a great way to have my own kids help out at home!

Here are the materials I assembled on a tray with a mat underneath:
On the tray: electrical tape, scissors, glass bowl with baking soda-filled shaker placed inside, sponge in small dish, scrub brush, small towel.  Underneath:  mat on which to place materials in use.

To begin, the child uses the tape and scissors to mark off one square on the tile...

...like this.  The laying of the tape provides a meaningful point of interest for the child.  Once this is done, the child then places the items on the mat from left to right:  bowl, jar with baking soda, sponge, brush, and towel.  (This picture does not show the brush and towel on the mat...)

Once the child fills the bowl with water, he then wets the sponge and wipes the surface of the squared-off tile using a top-bottom, left-right motion.  Then, baking soda is sprinkled onto the square.


Next, the child scrubs with the brush in a circular motion moving from top-bottom, left-right.

Scrubbing complete - Can't you already see the difference?


Now the child wets the sponge and wipes the square clean, re-wetting as necessary, using the same movement as before with sponge.

The square is dried with small towel...

...Clean tile revealed! 
Proof that plain baking soda and a good scrub works best!  Now, there are only about 699 tiles left...

In all seriousness, this is yet another Montessori Practical Life lesson which not only builds concentration, coordination, independence and order, but it also trains the eye in movement from left to right in preparation for reading and writing.  Additionally, the lesson promotes the use of both fine and gross motor skills.

Now that the materials are set up, they have a designated shelf in my pantry at home. When I get a few minutes here or there, all I have to do is grab the tray and do a few tiles at a time.  The boys added it to their list of  "Saturday Chores" and have agreed to complete a few tiles at time as well!  Our kitchen floor will finally get the scrub-down its needed for along time...